Produktion: FreeLens
The challenge:
Teams have to develop creative methods for measuring time, using only the equipment provided. Then they have to measure the duration of an event as accurately as possible. The team with the most accurate measurement wins!
Infobox
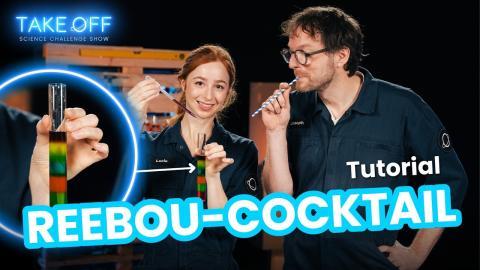
Take Off is a science game show in which 12 young adults face tough scientific challenges. One contestant is eliminated in each episode. In the grand final, the winner takes home a €10,000 prize.
The show is broadcast on RTL, RTL Play and YouTube. On Instagram and TikTok, you can watch short, amusing behind-the-scenes videos with the contestants and presenters.
The rules of the game:
- At the start, teams have 30 minutes to devise a method, build it and perfect it.
- During the construction time, teams can use a stopwatch to calibrate their method. Teams are told that the event will last between 3 and 10 minutes.
- Once the 30 minutes have elapsed, all the measuring instruments must be ready for use and the stopwatches are removed.
- The start of the event to be measured is signalled by a call from the challenge master, so that all the teams can stoart at the same time.
- The end of the activity is signalled by a stop call, so that all the teams can stop at the same time.
- The teams then have a few minutes to make their calculations before writing their results on a piece of paper and handing it in.
- The team whose measurement is closest to the actual time wins.
- All the equipment provided can be used. Methods that do not require equipment are also permitted.
- Several methods may be used at the same time.
You can watch the episode of Take Off in which this challenge is presented here.
From 14:15 onwards, you can see how the candidates met this challenge.
Key data
- Topic: Physics, time measurement
- Duration: 1h-1h15 (without the preparation)
- Teams: Groups of up to 5 people.
Material & preparations
Per group:
- 3 plastic bottles with cap
- 500 ml water
- 1 drawing pin
- 1 lighter / matchbox
- 1 roll of adhesive tape
- 3-4 small birthday candles + base (e.g. screw cap)
- 1 stopwatch
- 1 thick screw nut or other weight
- 2 metres of string
- 1 pair of scissors
- 1 pencil
- Optional: 1kg sand
- Optional: clicker
- 1 towel / cloth (for wiping up)
For the challenge master:
- 1 stopwatch (mobile phone)
Preparations
- Think in advance about the event that will determine the duration: this should take between 3 and 10 minutes. For example: someone reads a story, sorts all the books by colour...
- Get the materials
- Watch the video (above) with the possible methods
- Think about how best to divide the class into groups and where the groups can be distributed in the room
The PDF for printing out the list of materials and preparations is available here:
Infobox
The sequence of the challenge is based on 4 steps that allow the scientific method to be taught: 1st question, 2nd hypothesis, 3rd experiment/test, 4th conclusion.
The question is the actual challenge. The students then formulate their hypotheses intuitively: How exactly do I want to best solve the challenge? Which method is the most promising? This hypothesis is then tested in the experiment or competition. If different groups have different approaches, different hypotheses are tested. The result then shows which hypothesis was the better one.
Steps:
1. Ask the question/challenge:
The challenge master (teacher) explains the challenge and the rules. The students should ask as many questions as possible here so that they understand everything and the rules are clear to everyone before the challenge starts.
2. Formulate hypotheses:
The groups have a few minutes to look at all the materials and think about which method they can use to win the challenge. They reflect on various hypotheses. at this point it is very important that the students have the information that the event they will be timing will take between 3 and 10 minutes. This way, they know how long their timing method has to work.
3. Experiment/competition:
In this challenge, this phase is divided into two parts: 1. the construction and calibration phase 2. the competition.
The duration of the construction phase can last between 20 and 45 minutes, depending on how much time is available. Less than 20 minutes is too little time to find good methods. During this phase, the students are allowed to calibrate and test their methods with the stopwatch. When the construction phase is over, all groups must be ready to start the measurement. All groups must hand back their stopwatches and all other clocks. All clocks in the classroom should also not be visible.
Now the competition can begin, in which the groups test their hypotheses/methods. The challenge master gives the ‘go’ to signal the start of the time measurement and starts the time on their stopwatch. The challenge master then also signals the end of the event with a ‘stop call’ and writes down the real duration without the groups seeing it.
The teams now have a few minutes to write their result and their team name on a piece of paper and hand it in. The challenge master then announces the winning team.
4. Conclusion/explanation:
Now discuss together which method(s) was/were best and why. Why was the winning method better than the others? Why did the other methods not work so well? If necessary, the groups can also try out another method in a second round in order to improve.
Possible methods
We introduced you to some possible methods in our YouTube video (above). In the following section, we provide scientific background information on what we believe to be the simplest and most precise method: the pendulum. This information can be used for discussion during the conclusion phase.
For a method to work reliably, it should operate as uniformly as possible. This is the case with a pendulum because its period—the time it takes to complete a full swing from one side to the other—depends solely on its length. The period of an ideal pendulum can be described by the following formula:

where:
- T is the period (time for a complete oscillation),
- ℓ is the length of the pendulum,
- g is the acceleration due to gravity (approximately 9.81 m/s²), which is a constant,
- π is also a constant.
Thus, the period does not depend on the mass of the pendulum or the amplitude (the height of the swing). No matter how high or low the pendulum swings, the oscillation duration remains constant. This is precisely why the pendulum is a particularly reliable method for measuring time. Of course, a pendulum will eventually stop swinging after a few minutes. However, if you push it again, its period remains unchanged.
There’s even a trick: if the length (i.e., the distance between the center of mass and the fixed point of the pendulum) is exactly 1 meter, then T = 2 seconds. In that case, you only need to count the number of oscillations.
If you want to learn more about time measurement, you can watch this video by Mr. Science: Mister Science - Auer
You can find more Take Off Challenges to reproduce here.
In our section ‘For teachers and parents’ - ‘Ideas for science lessons at school’, we also have a few more science challenges and a whole host of experiments that you can simply copy with your class, with complete lesson plans.
In our ‘Experimenting’ section you will also find numerous experiments to try out yourself.
Author: Lucie Zeches (FNR)
Editor: Joseph Rodesch (FNR)
Die Ausarbeitung dieser Rubrik wurde von science.lu in Kooperation mit dem Script (Service de Coordination de la Recherche et de l´Innovation pédagogiques et technologiques) durchgeführt.